All Categories


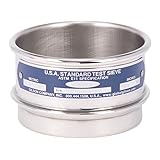
Gilson Performer V3SF #325 Stainless Steel Sieve, 325, 3" Diameter, Full Height
Share Tweet
Get it between 2025-02-04 to 2025-02-11. Additional 3 business days for provincial shipping.
*Price and Stocks may change without prior notice
*Packaging of actual item may differ from photo shown
- Electrical items MAY be 110 volts.
- 7 Day Return Policy
- All products are genuine and original
- Cash On Delivery/Cash Upon Pickup Available


Gilson Performer V3SF #325 Stainless Steel Features
-
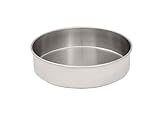
Extended-Rim pans are also available to insert into the middle of a stack, allowing two samples to be tested at once
-
Package Dimensions: 9.4 H x 6 L x 9.1 W (centimeters)
-
Package Weight: 0.115 kilograms
-
Country of Origin : United States
About Gilson Performer V3SF #325 Stainless Steel
Gilson ASTM 3" diameter Round Stainless-Steel Test Sieves meet the requirements of ASTM E 11. Stainless Steel Frame with Stainless Steel Cloth assures a sieve with the longest possible service life. This is the best choice where contamination, sanitation or extreme wear is an issue. Full-height or half-height frames available. All are serial numbered and supplied with a certificate of manufacturing conformance. Mesh Opening Sizes are listed using standard millimeter (mm) or micrometer (µm) descriptions, as well as traditional inch and number designations where appropriate. Gilson offers all mesh sizes, but not all sizes are available in every frame diameter. Common coarse sizes are also listed. Normally, every second or fourth size is used, although precision testing may require consecutive sizes. Additional sieves are often inserted into the sequence to avoid overloading of individual sieves or to better define a particular size range. Frame Diameter should be large enough to accommodate the entire sample volume with enough surface area to avoid overloading individual sieves. The frame diameter selected must also fit the sieve shaker being used. Half or Intermediate-Height frames allow a greater number of sieves to be used when stack height is limited. Full-Height frames allow free movement of larger particles during agitation for more efficient separation. ISO Test Sieves are fitted with black rubber O-rings. Pans collect fines at the bottom of the sieve stack. Sieve Verification procedures should be in place to regularly check working sieves as they age. Wire cloth stretches, sags, or even tears, and abrasive materials reduce wire diameter, causing an increase in opening size and loss of accuracy over time. Periodic, controlled measurement of openings helps determine sieve compliance. These measurements can be taken directly, using calipers or an optical comparator, or by testing a Standard Reference Material on the working sieves.


