All Categories


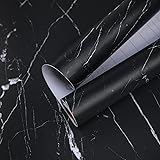
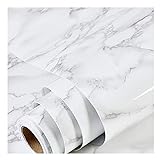
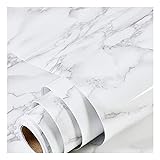
practicalWs Marble Wallpaper Granite White and Grey Paper Roll 23.6" x 118" Kitchen Countertop Cabinet Furniture is Renovated Thick PVC Easy to Remove Without Leaving Glue Upgrade
Share Tweet
Get it between 2025-03-14 to 2025-03-21. Additional 3 business days for provincial shipping.
*Price and Stocks may change without prior notice
*Packaging of actual item may differ from photo shown
- Electrical items MAY be 110 volts.
- 7 Day Return Policy
- All products are genuine and original
- Cash On Delivery/Cash Upon Pickup Available


practicalWs Marble Wallpaper Granite White and Grey Features
-
Product Introduction: Width is 60cm about 23.6 inches, length is 300cm about 118.1 inches, area is about 19.3 square feet. The material is PVC, self adhesive no extra glue needed. Our marble is manufactured based on real marble to give customers the look of real marble. As the color of the picture will be affected by factors such as screen display and shooting light, the actual color of the product should prevail in kind
-
Marble Wallpaper Application: Easy to install. First peel the backing paper and stick it on the surfaces you want to cover. The solid line grid on the back can help you cut the product into any shape you need. If you paste the product in the wrong place, you can gently remove it and reposition it. If there are bubbles during the pasting process, you can use a needle shaped object to puncture the bubbles and gently smooth them out with a scraper
-
Marble Wallpaper Features: Authentic marble look. Refurbish your furniture on a super low budget. Simple process. Our marble paper also helps you to boost your creativity and create brand new furniture pieces DIY
-
Marble Wallpaper Use: Marble Self Adhesive Paper is update. Can be applied to the object with the smooth surface, kitchen counter, furniture, notebook, dresser drawer, crafts, bedside table, bookcase, door even wall
-
Marble Wallpaper Tips : 23.6 inches and 35.4 inches width can cover wider countertops and do not need to be spliced, two people can install together for better adhesion. If you encounter any problems during use, please feel free to tell us, we will solve the problem for you at the first time
About PracticalWs Marble Wallpaper Granite White And Grey
Color: White/Gray Faux Marble Contact Paper Material: Vinyl Contact Paper Roll Size: 24 x 118in = 19.3sq.ft (by feet), 3m x 0.6m = 1.8sq.m (by meter) Usage: Wall decoration, cabinets and drawers, counter tops, bookshelves, closet shelving, and pantry areas Instruction For Use: 1. CLEAN: Clean up the surface thoroughly, making sure that there is no dust . Wait the surface DRY completely before the installation (please be two people working together, the width of the update, a person is difficult to complete) 2.Measure & Cut: Cut the film to the desired size through the grid lines. It is suggested to leave 2-3cm margins at each side for later adjustment 3.Apply: one from the side, peel off the backing, and applying the film to the surface inch by inch (do not remove the entire backing at once) 4.Flatten: While applying the film, use a cloth, a squeegee or a card to remove the air bubbles or bump areas 5.Enjoy: Trim off the margins, enjoy your new gorgeous top surface Notes: - Make sure that the surface is clean and flat . - Heavily textured surfaces may affect the adhesive glue effect. - Using a smooth surface is therefore strongly recommended! - Be careful when working with the utility knife in order to avoid - Color tones can vary due to lighting in the room, pictures on wall for reference only - Please buy enough rolls at a time to make sure they come from the same batch to avoid color difference.


