All Categories


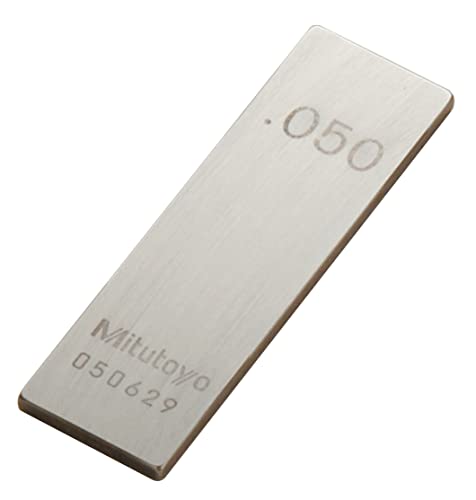
Mitutoyo Steel Rectangular Gage Block, ASME Grade AS-1, 0.022" Length
Share Tweet
Get it between 2025-03-13 to 2025-03-20. Additional 3 business days for provincial shipping.
*Price and Stocks may change without prior notice
*Packaging of actual item may differ from photo shown
- Electrical items MAY be 110 volts.
- 7 Day Return Policy
- All products are genuine and original
- Cash On Delivery/Cash Upon Pickup Available


Mitutoyo Steel Rectangular Gage Block, ASME Grade Features
-
Grade AS-1 gage block supplied with a Mitutoyo certificate of inspection that the block meets American Society of Mechanical Engineers (ASME) B89.1.9-2002 standard for flatness, length, parallelism, and surface finish
-
High-carbon, high-chrome steel provides high hardness and wear-resistance
-
Rectangular base for accurate wringing
-
Nominal length (in inches) indicated with laser-etched, black characters
-
Identification number etched in block for traceability
About Mitutoyo Steel Rectangular Gage Block, ASME Grade
The Mitutoyo grade AS-1 rectangular gage block is made of steel, has its nominal length engraved in inches, and is supplied with a Mitutoyo inspection certificate that states that the block meets American Society of Mechanical Engineers (ASME) B89.1.9-2002 grade standard for flatness, length, parallelism, and surface finish. The inspection certificate specifies the deviation of the individual block from its nominal length. Gage blocks are commonly used to calibrate fixtures and precision instruments in workshop, inspection, and dimensional metrology applications, to inspect tools such as mounting tools, cutters, fixtures, and mechanical parts, and in the gage manufacturing process itself. This grade AS-1 gage block is commonly used for workshop and inspection applications to calibrate fixtures and precision instruments, to inspect a variety of tools such as mounting tools, cutters, fixtures, and mechanical parts, and for gage manufacturing applications. It is made of high-carbon, high-chrome steel which has a high hardness for minimum deterioration, and is selected for its wear-resistance. This gage block has a rectangular base for accurate wringing. Nominal length is measured in inches, and is indicated with laser-etched, black characters. The length of a gage block is usually slightly shorter than its stamped nominal length, to account for the thin layer of oil or wring film used when two or more blocks are wrung together. An identification number is laser-etched on the block for traceability. The block has a depth of 0.355 inches. It comes in a carrying case with a padded, formed interior. This gage block is supplied with a Mitutoyo inspection certificate [National Institute of Standards in Engineering (NIST)-traceable] that the block meets ASME B89.1.9-2002 standard for flatness, length, parallelism, and surface finish. Gage blocks (also called gauge blocks, Hoke blocks, Jo blocks, slip gages, and Johansson gages) are blocks used to calibrate measuring equipment and to standardize the measurement of length in manufacturing industries. They are commonly made of precision-ground steel, ceramic, or carbide material, and have a square or rectangular base. Each block has a unique identification number. Length is in inch or millimeter measurement. They can be sold individually, and are also sold in sets with blocks of varying lengths. Gage blocks can be wrung together to create a required length. Wringing is the process of lapping blocks together with a small amount of oil. They are standardized by grade, which refers to the tolerance or deviation of an individual block from its nominal length. Gage block grades are defined for flatness, length, parallelism and surface finish. Some grades of gage blocks meet standards such as ASME, Association for Iron and Steel (AIST), and International Organization for Standards. Application and required level of accuracy dictate which grade of gage block should be used. Some manufacturers provide an internally-generated certificate of inspection to verify that a gage block meets grade standards. Gage blocks can also go through a calibration certification process to verify measurement accuracy. Calibration is performed by an accredited facility. Gage blocks are commonly recalibrated after use to ensure dimensional accuracy. If a gage block does not meet calibration standards, it should no longer be used. Both a certificate of inspection and a calibration certificate specify the deviation from the nominal length. Mitutoyo manufactures precision measuring tools, metrology equipment, and systems. The company was founded in Tokyo in 1934 and formed Mitutoyo America Corporation in 1963, which is headquartered in Aurora, IL.


