
We specialize in hard to find items

All Categories


Feekoon SS2 Float Switch L Shape, AC Float Switch with 3/4 Inch Adaptor and 6Ft Wire, Water Float Switch for HVAC System with Condensate Overflow Detection (White)
Share Tweet
*Price and Stocks may change without prior notice
*Packaging of actual item may differ from photo shown
- Electrical items MAY be 110 volts.
- 7 Day Return Policy
- All products are genuine and original
- Cash On Delivery/Cash Upon Pickup Available


Feekoon SS2 Float Switch L Shape, AC Float Switch Features
-
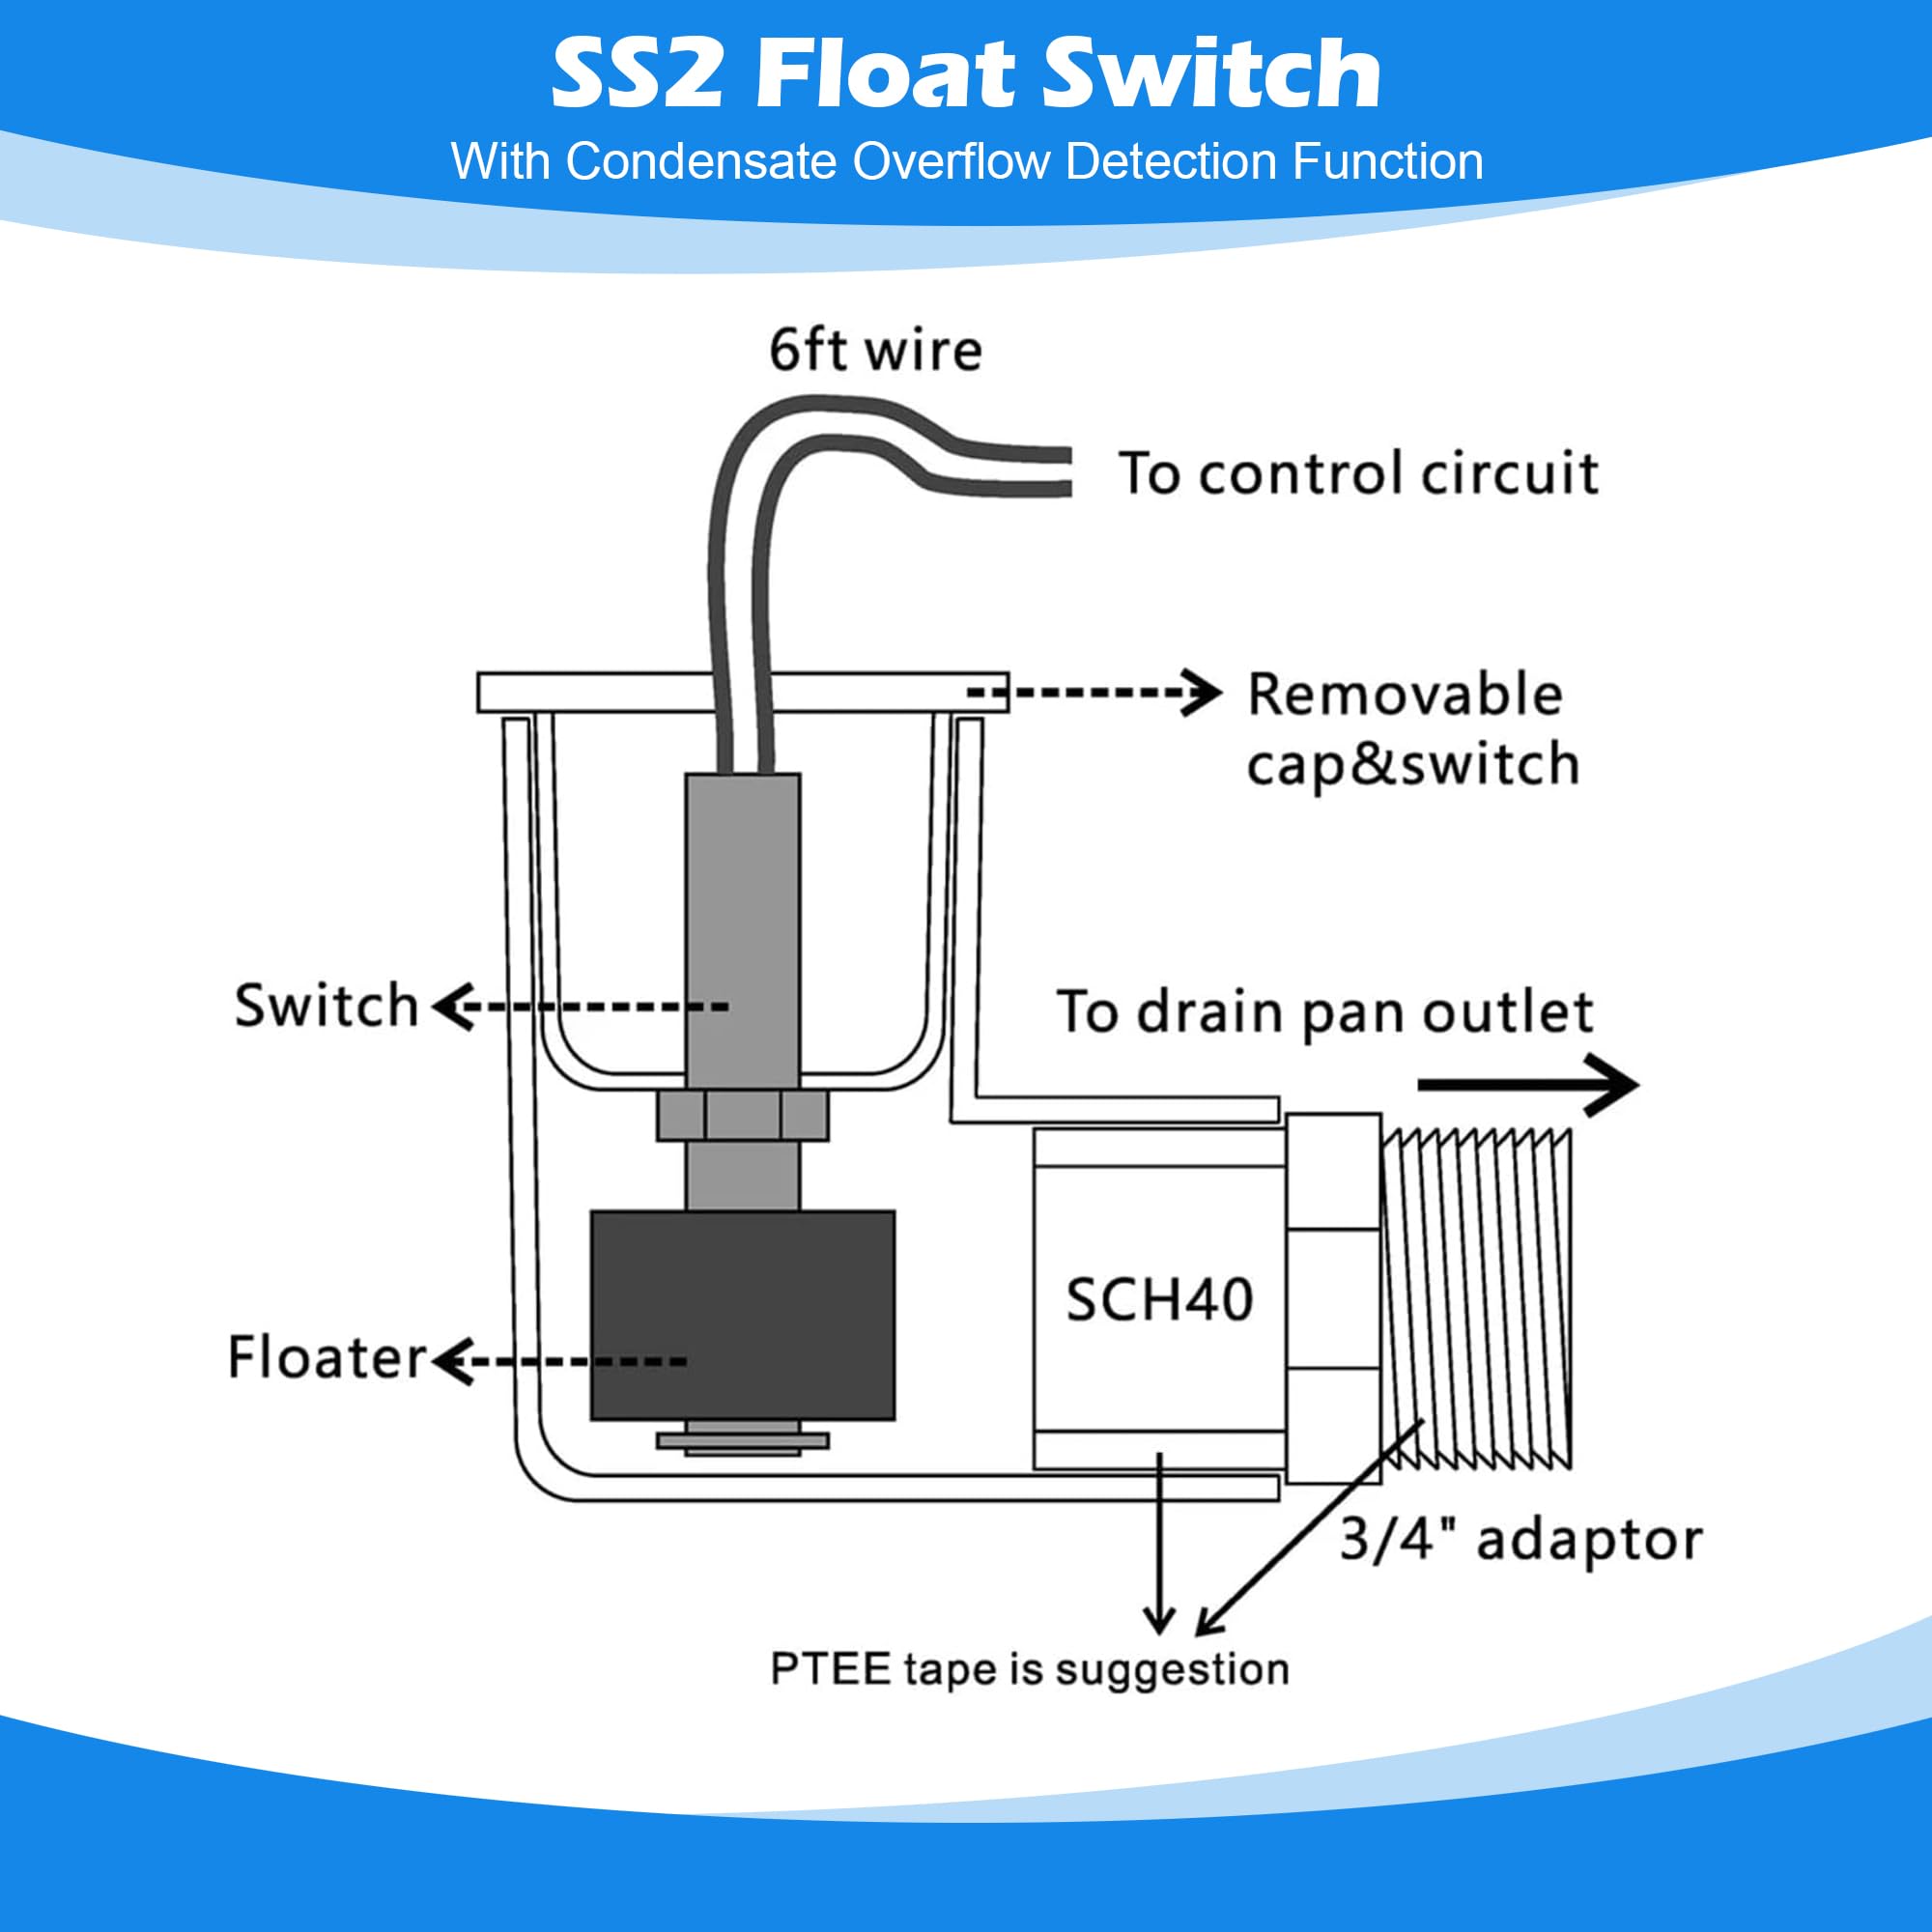
Easy to Install: this float switch HVAC is easy to install and can be successfully operated even by non professionals, all you need to do is install the 3/4 adaptor that comes with this AC float switch on the auxiliary drain outlet of primary pan and connect the 6ft wire to the VCC or thermostat wires; While this AC float switch HVAC is easy to operate, it definitely does its job, and you deserve such a simple yet powerful product
-
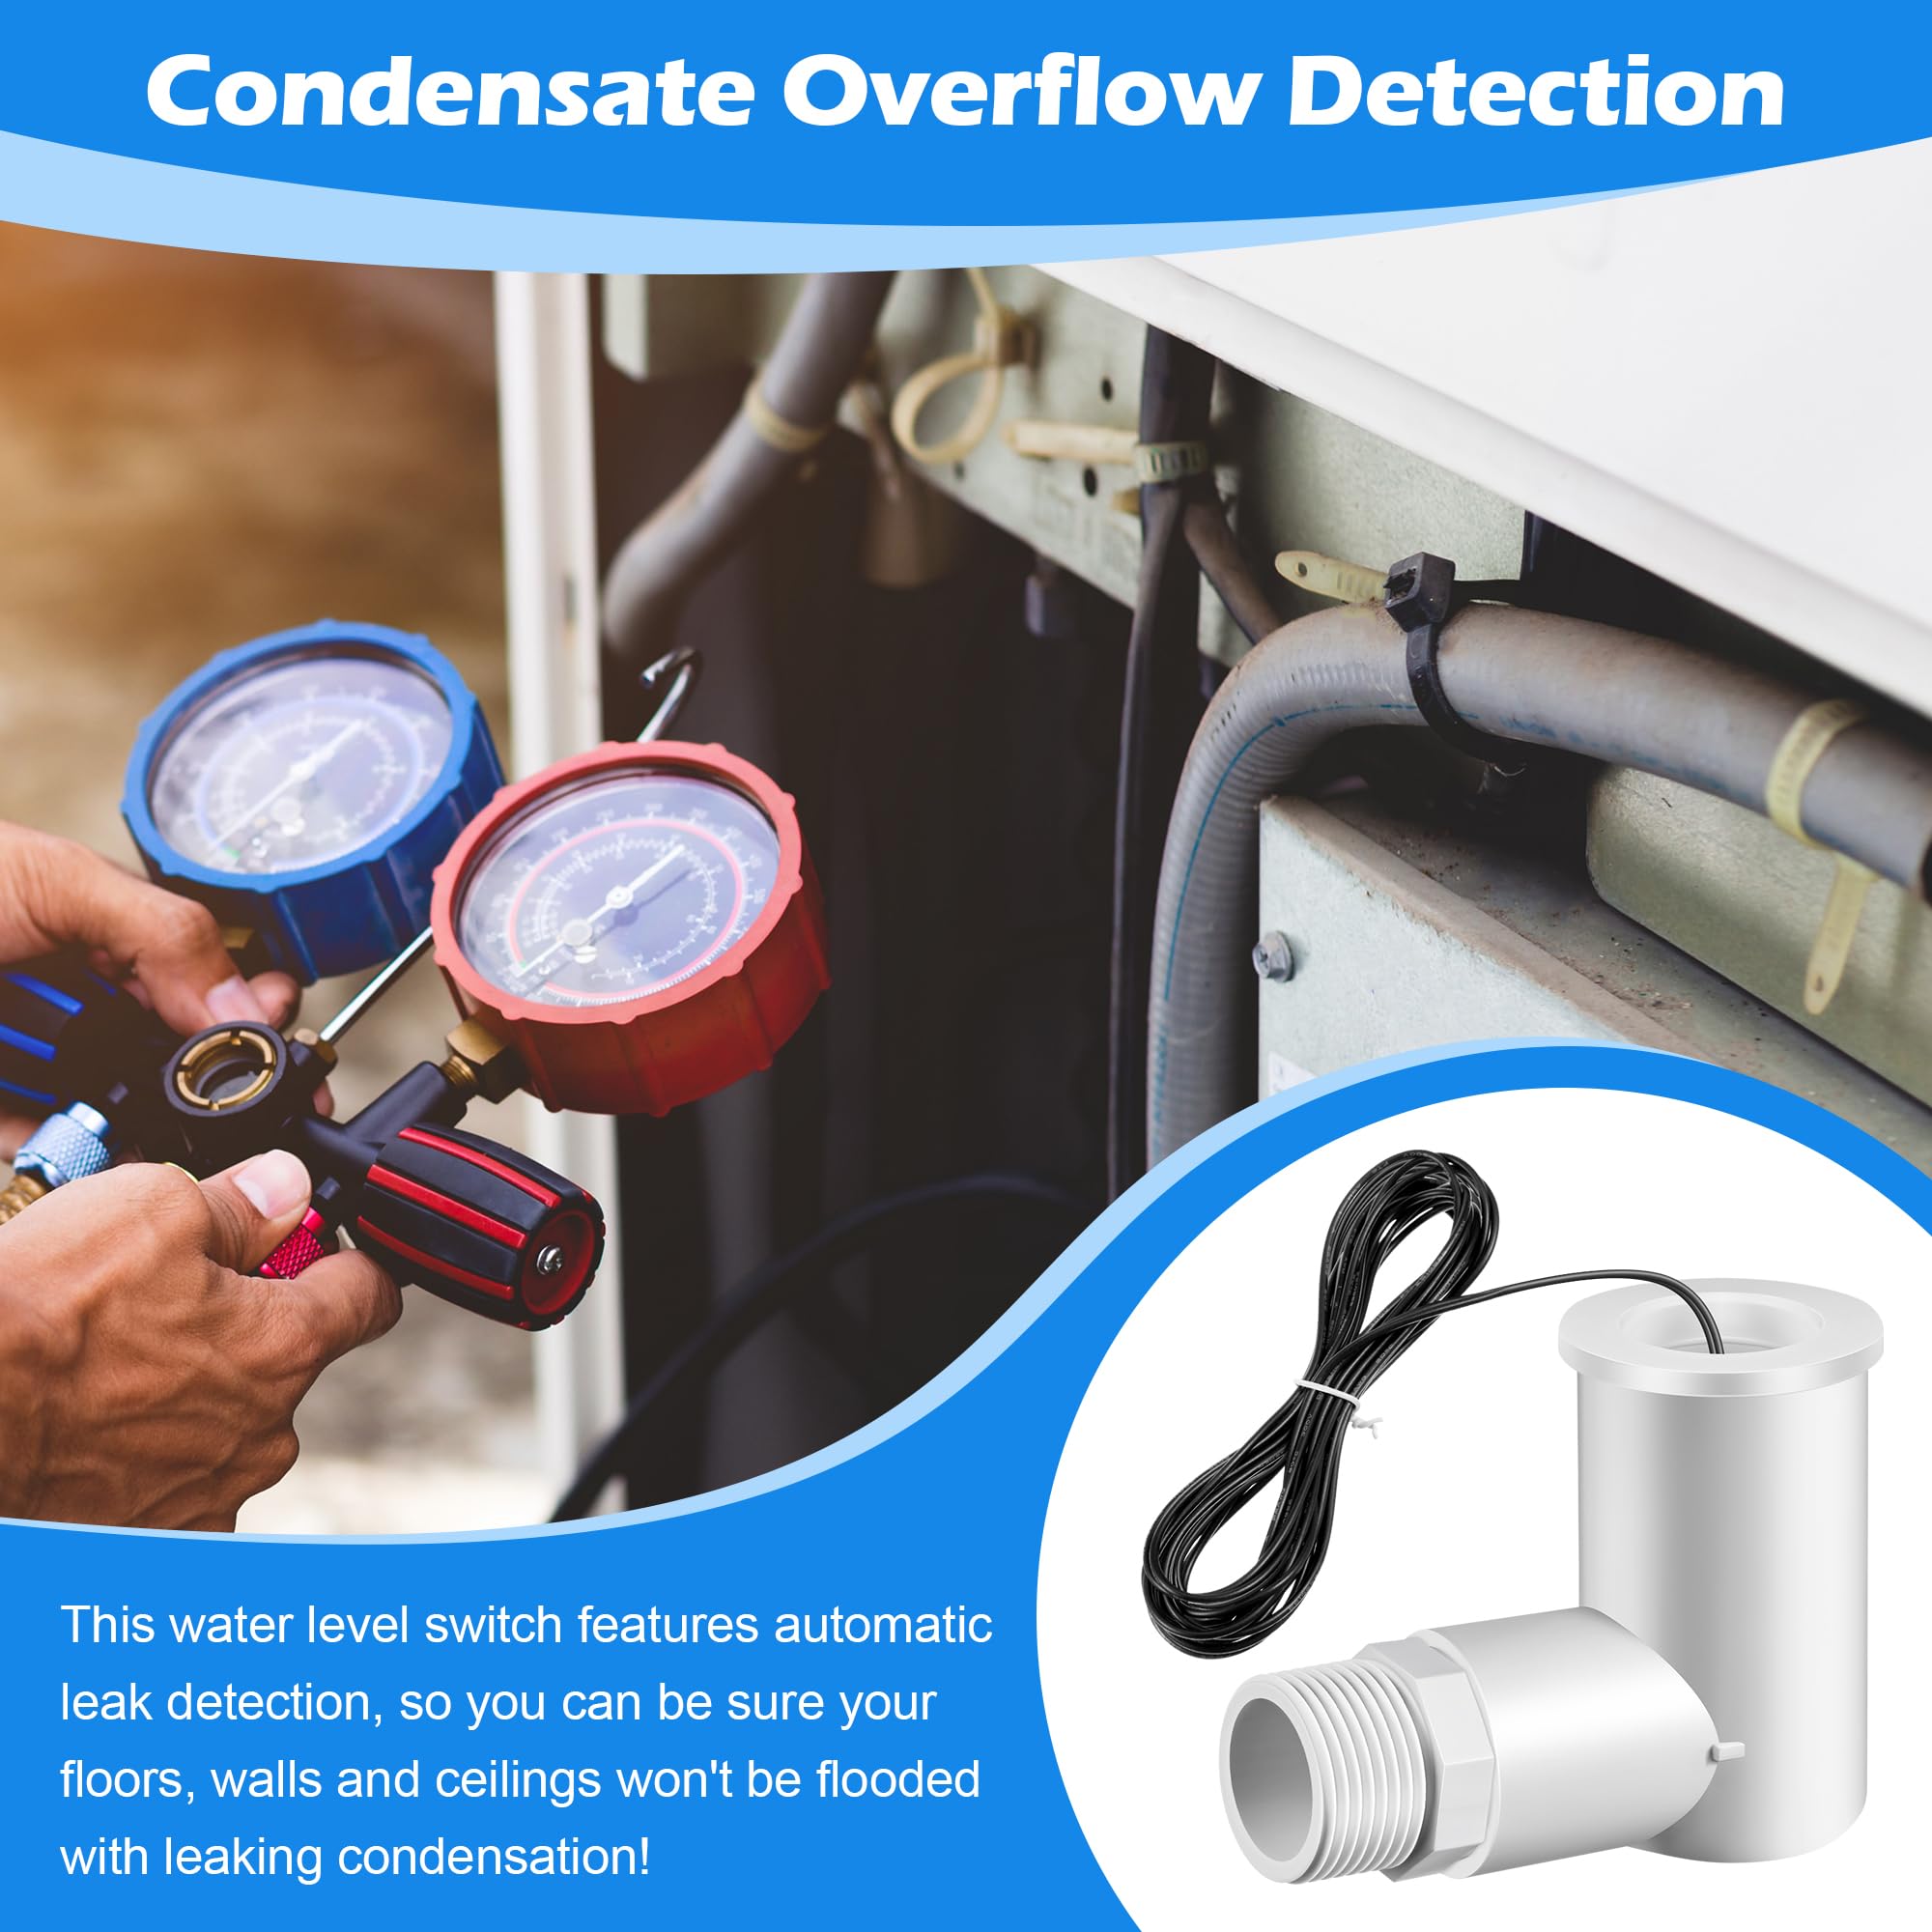
Quality and Utility: this float switch is practical and useful; And because this water level switch has automatic leak detection, you can be sure that your floors, wall, and ceilings won't happen to be flooded with leaking condensate; Every home with an HVAC deserves a float switch HVAC, so you can use your HVAC without worrying about property damage due to condensation leaks
-
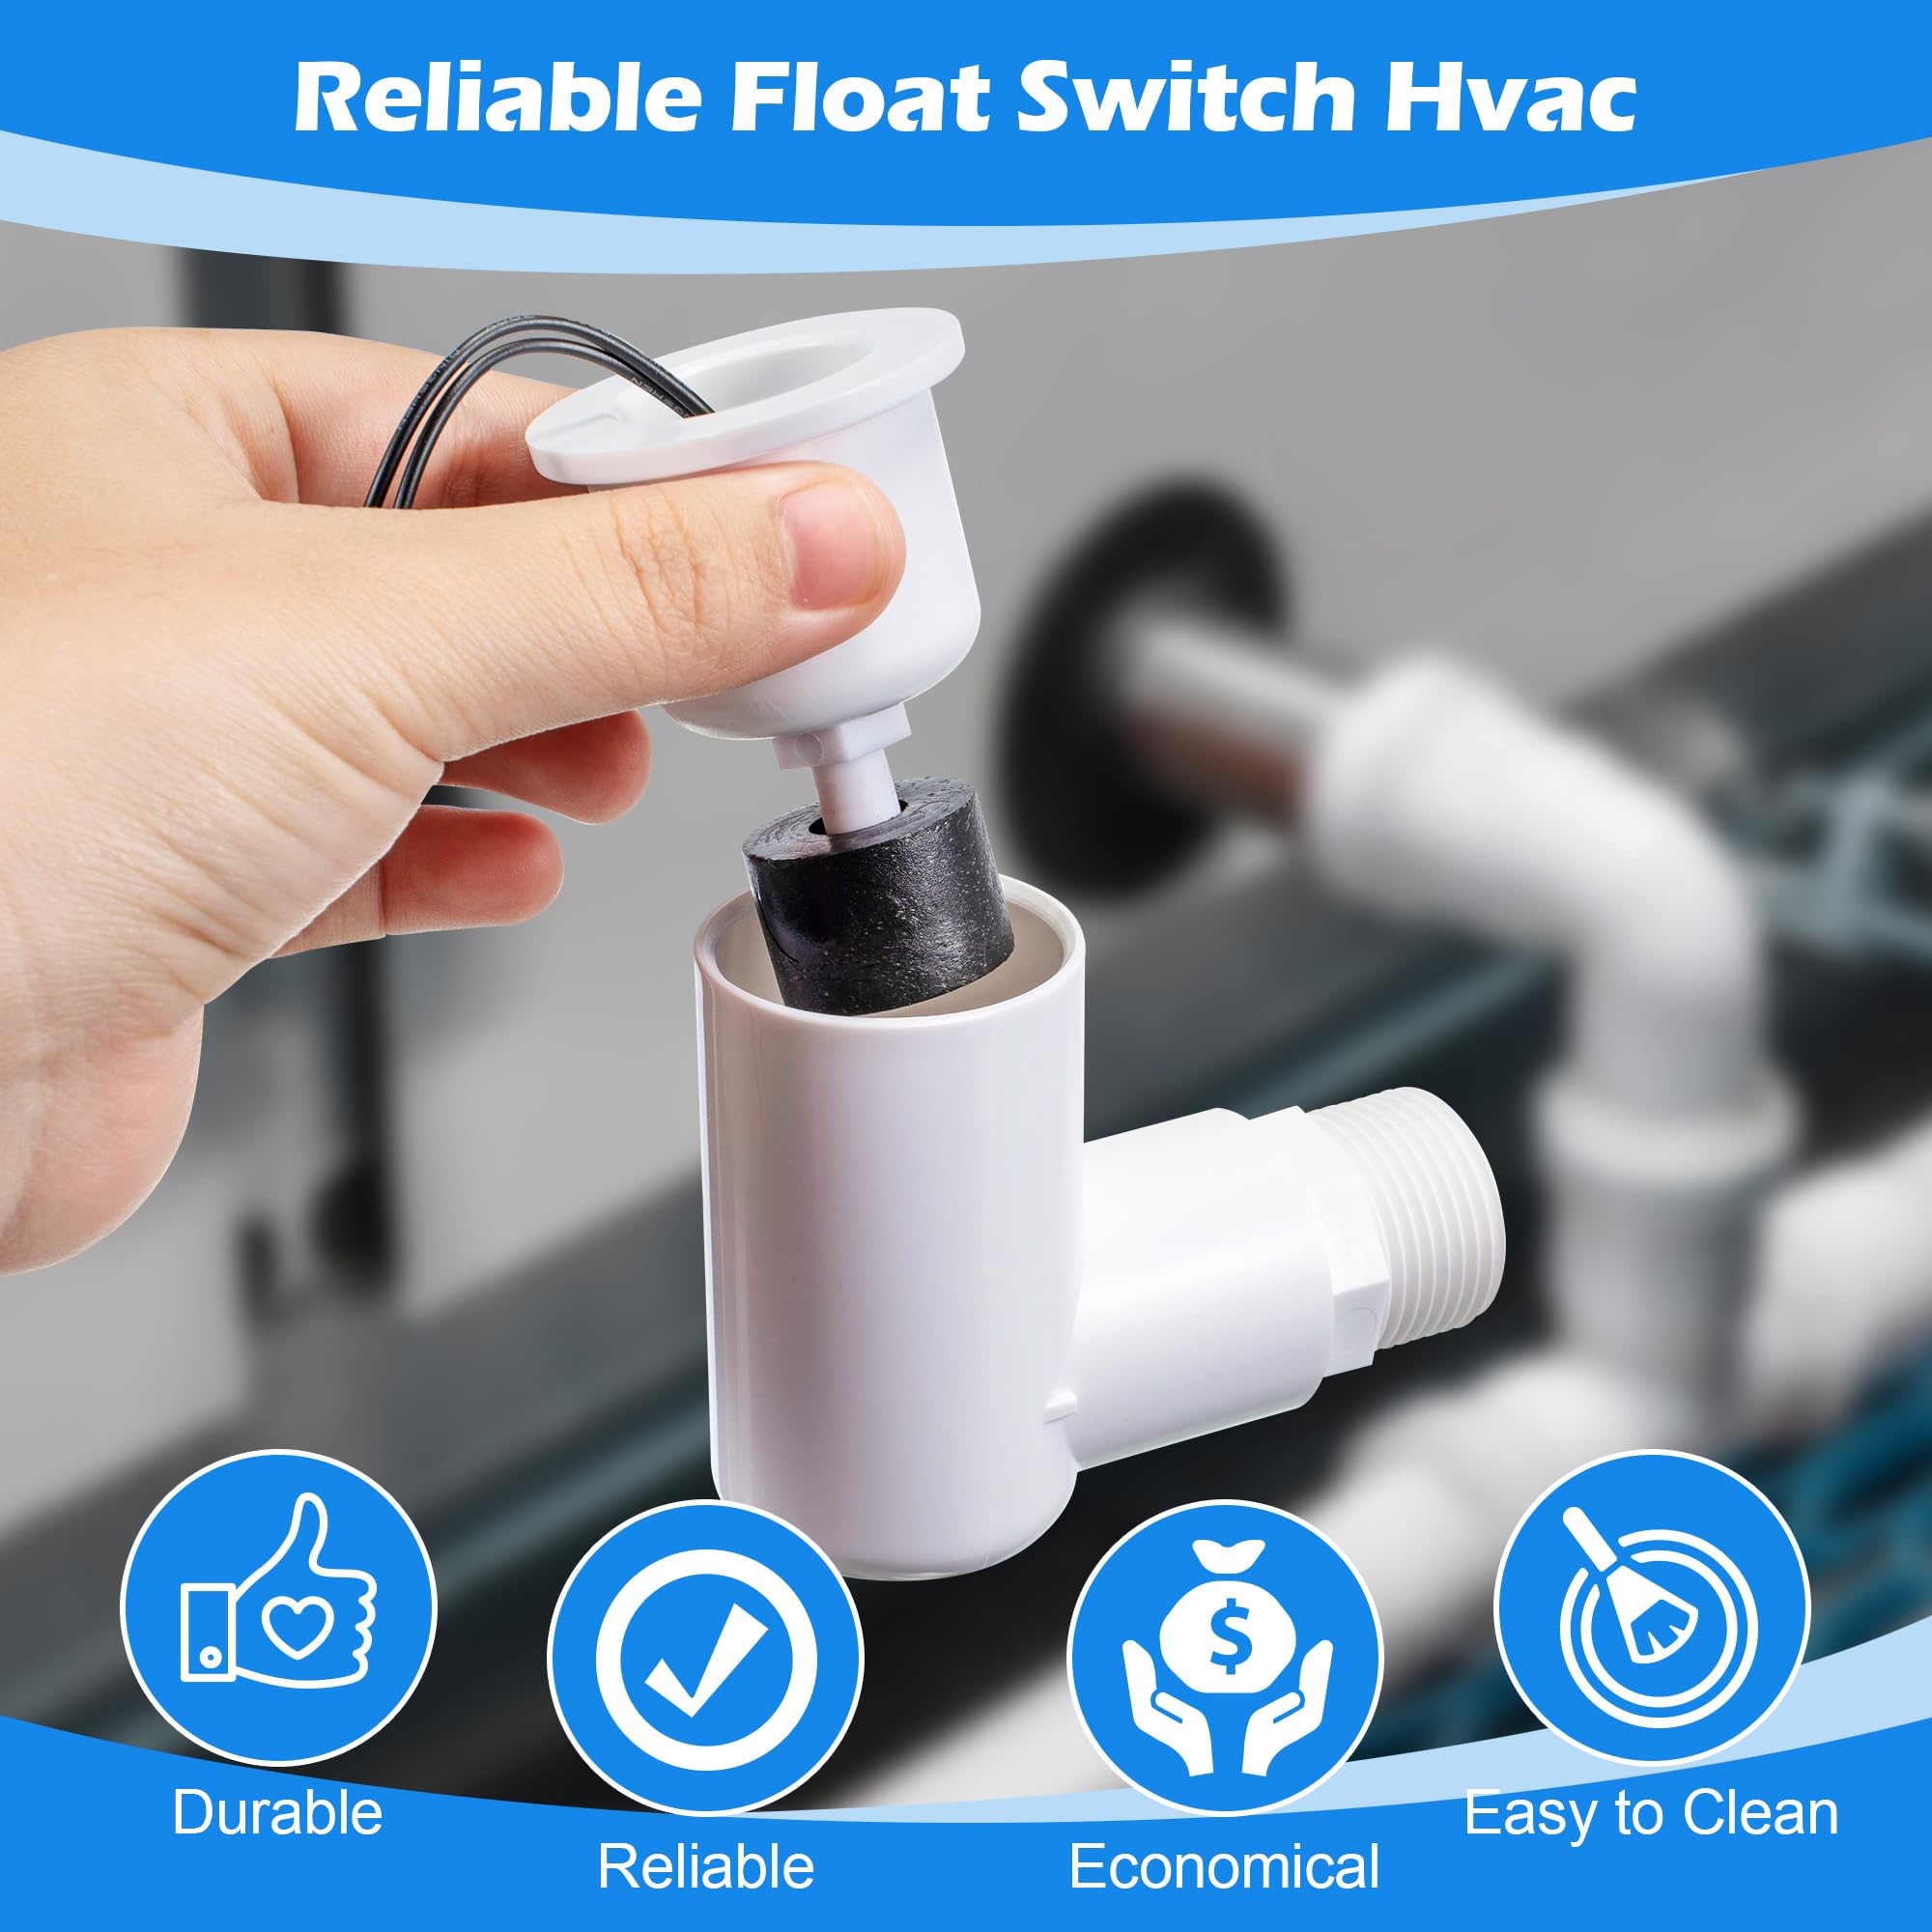
Precision Design Products: SS2 float switch HVAC is made with advanced technology and includes 3/4 adaptor, busing, cap and switch; This AC float safety switch is so technically well made and has such good performance that it will work best for both personal home use and industrial applications, providing safety and protection for your equipment
-
Easy to Clean: this float switch comes with a removable cover that allows you to remove it for cleaning when you've been using it for a while, ensuring both hygiene and proper function; It is worth noting that you can use PTEE tape for the adaptor connecting to get high watertight
-
Warm Tips: the float switch is applied for weak current(0-0.2A) only, it cannot load directly; If the AC float switch is applied for triggering power device, relay or SSR for signal output transition in necessary; Please note that the maximum parameters of this SS2 float switch are theoretical values and are not intended for operation; The switch can be installed even slight tilt and does not need to be level or plumb
About Feekoon SS2 Float Switch L Shape, AC Float Switch
Are you still worried about soaking your furniture due to condensation leaks when using your HVAC? Then you absolutely need a float switch! Here are the specific installation steps for you: INLINE INSTALLATION FOR (WALL) UNITS WITH VERTICAL DRAIN OUTLETS It is recommended that this device be installed on the primary drain line between the pan outlet and P trap on wall units with vertical drain outlets. This will prevent the switch from shutting off the fan coil or activating the alarm circuit in the event condensate drips directly from the coil into the auxiliary pan outlet when the coil becomes dirty. 1. Disconnect power to unit at main panel and glue 5'' stub down from the primary pan outlet. 2. Glue 3/4'' Tee to bottom of stub with Tee stem horizontal and plumb. 3. Glue 3/4'' stub into horizontal outlet of Tee, insuring it is also plumb. 4. Ensure switch/plug assembly is inserted into 1'' inlet of PVC elbow so that float stem is at inside (bottom) of switch elbow. Float stem can be adjusted by threading it out of the plug assembly. DO NOT GLUE. 5. Glue a drain line with P trap onto the remaining outlet of Tee. 6. Connect the wires to VCC or the thermostat wires. 7. Test switch by lifting float with unit running. Unit should stop running if correctly wired. 8. Test all fittings and connections for plumbing leaks. INSTALLATION FOR HORIZONTAL CEILING (PANCAKE) UNITS NOTE: Primary drain (inline) is also recommended on horizontal ceiling (pancake) units as some flooding may occur if installed on auxiliary outlets, due to the closeness of the outlets to the top of the pan. 1. Glue 3/4'' stub to primary pan outlet. 2. Glue 3/4'' Tee onto stub with Tee stem positioned horizontally away from the unit and plumb. 3. Follow steps 3-9 under INLINE INSTALLATION FOR WALL UNITS, above.


