All Categories


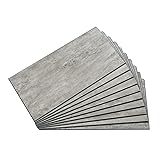
Art3dwallpanels PVC 3D Wall Panel for Interior Wall Décor, 19.7" x 19.7" Wall Decor PVC 3D Wall Panels, 3D Textured Wall Panels, Pack of 12 Tiles, White
Share Tweet
Get it between 2025-01-02 to 2025-01-09. Additional 3 business days for provincial shipping.
*Price and Stocks may change without prior notice
*Packaging of actual item may differ from photo shown
- Electrical items MAY be 110 volts.
- 7 Day Return Policy
- All products are genuine and original
- Cash On Delivery/Cash Upon Pickup Available


Art3dwallpanels PVC 3D Wall Panel for Interior Wall Features
-
🎈REAL 3D DESIGN : Diamond pattern with 1 inch raise design make our wall panels more eye-catching. 19.7'' x 19.7'', 12 panels in one package, covers 32.Sq.Ft.
-
✨BE YOUR OWN DESIGNER: Easy to DIY, no specialized knowledge is required. Plan the 3D accent wall panels by yourself. Replace the boring wall, get a fresh look for your room.
-
🎐PREMIUM MATERIAL: This 3d wall panels is made of premium PVC, thin and light which is easy to install. Waterproof, fire-resistant features which make this wall panel more sturdy and durable.
-
🎊WIDE APPLICATION: Add new wall decor in your home! Perfect wall panels for interior wall decor in living room, bedroom, game room, bathroom, feature wall, ceiling, mancave. Also can be used as 3d wall decor commercial.
-
💖BRAND GUARANTEE: Every customer is in good hands, we guarantee delivering a good quality item to our customers, money back for any defect and damage.
About Art3dwallpanels PVC 3D Wall Panel For Interior Wall
3D WALL PANEL INSTALLATION MANUAL 1. PREPARATION FOR THE WALL All the basic wall must be flat, dry, clean and firm. If the wall is Aged , the surface must be painted with water-based seal primer to fix the loosen surface firstly. 2. PREPARATION FOR THE WALL PANEL Open the box and take out the panles very carefully. Each 5pcs in one stack. Put the panels on the clear and dry floor for 24 hours to balance the moisture between panels and environment, to prevent excessive expansion or contraction after installation. 3. MEASURE THE WALL Measure the size of wall to find out the central point of it, then mark vertically and horizontally. Arrange it on the floor by rotating the panels before attempting to install, ensuring correct installation of the desired pattern. 4. INSTALL THE COMMODITIY ON THE WALL Put the heavy duty construction adhesive to the lower parts of panel back, to put the adhesive higher than the panel back. Apply the panels on the wall same as planned design, pressing the panels’ edges to ensure all the panels adjoin the wall tightly, Clean the glue which is flow out of the panels. It will be better to set asideit two hours for drying, then move to the next step. 5. CUTTING THE PANELS If meet the corner or electric outlet of wall part, we can draw line one the panel then use knife or electric saw to cut panels freely according to the line to fit the wall suituaion. 6. CUT EDGES TRIMMING AND PAINTING If the cut edges of panels meet the corner or end of wall, fill the cut edges with sheetrock compound/acrylic caulking. If additional finish is needed, paint the panels with oil base lacquer.


