All Categories


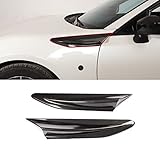
RT-TCZ for Jeep JL Side Fender Vent Decal Trim Cover for Jeep Wrangler JL JLU Gladiator JT 2018-2024 Blue Exterior Accessories 2pcs
Share Tweet
Get it between 2025-01-24 to 2025-01-31. Additional 3 business days for provincial shipping.
*Price and Stocks may change without prior notice
*Packaging of actual item may differ from photo shown
- Electrical items MAY be 110 volts.
- 7 Day Return Policy
- All products are genuine and original
- Cash On Delivery/Cash Upon Pickup Available


RT-TCZ for Jeep JL Side Fender Vent Decal Trim Features
-
【COMPATIBILITY】RT-TCZ for Jeep JL Blue Exterior Accessories Compatible with Jeep Wrangler JL JLU Gladiator JT 2018 2019 2020 2021 2022 2023 2024
-
【HIGH QUALITY】RT-TCZ for Wrangler JL Blue Side Fender Vent Decal Trim Cover made of high-quality ABS plastic and used polish process for deformation protection, anti-corrosion, and years of trouble-free use
-
【UNIQUE DESIGN】No Modification Required. Dust-proof, Durable, And Corrosion Resistance; No Damage, Beautiful, Shiny, And Stylish. Allow The Whole Product Is A Perfect Fit, Never Fade, Fear Not Scratch
-
【EASY AND QUICK INSTALLATION】Double-sided tape Automotive Adhesive Tape Is Attached. 1. Clean The Surface Area Where You Need To Paste And Then Wipe The Water With Towel Or Tissues; 2. Remove the cover on the Double-sided tape;3. The Double-sided tape position should align properly on the place; 4. Finally, press the decorative piece by hand, making it more solid on it. Please press 20-30 seconds or more
-
【SATISFACTION SERVICE】If you're not 100% satisfied with our item, simply return it for a full in 30 days, no questions asked money-back service. Premium Support & 1 Years’ After-care Service
About RT-TCZ For Jeep JL Side Fender Vent Decal Trim
Description: Condition:100% Brand New Color: Carbon Fiber Material:Made Of high quality ABS plastic Features: ☆Made of durable and long lasting material.Durable and color will not fade out. ☆Upgrade the look of the interior of your car, it will provide a unique and fashion decoration style. ☆Cover existing scratches and prevents your car from future finger nails, keys scratches etc. ☆Perfect match for the original car,easy installation. Installation guide: Step 1. With rubbing alcohol clean all the place where the decorative pieces will be pasted(very important) Step 2. Wait a minute until the alcohol is dry, remove the protective film on the adhesive tape.And use the lighter or hair dryer to add some heat to the tape. Step 3. Paste the decoration trims in the corresponding position Step 4. Press the decorative piece firmly into place.


