We specialize in hard to find items

All Categories


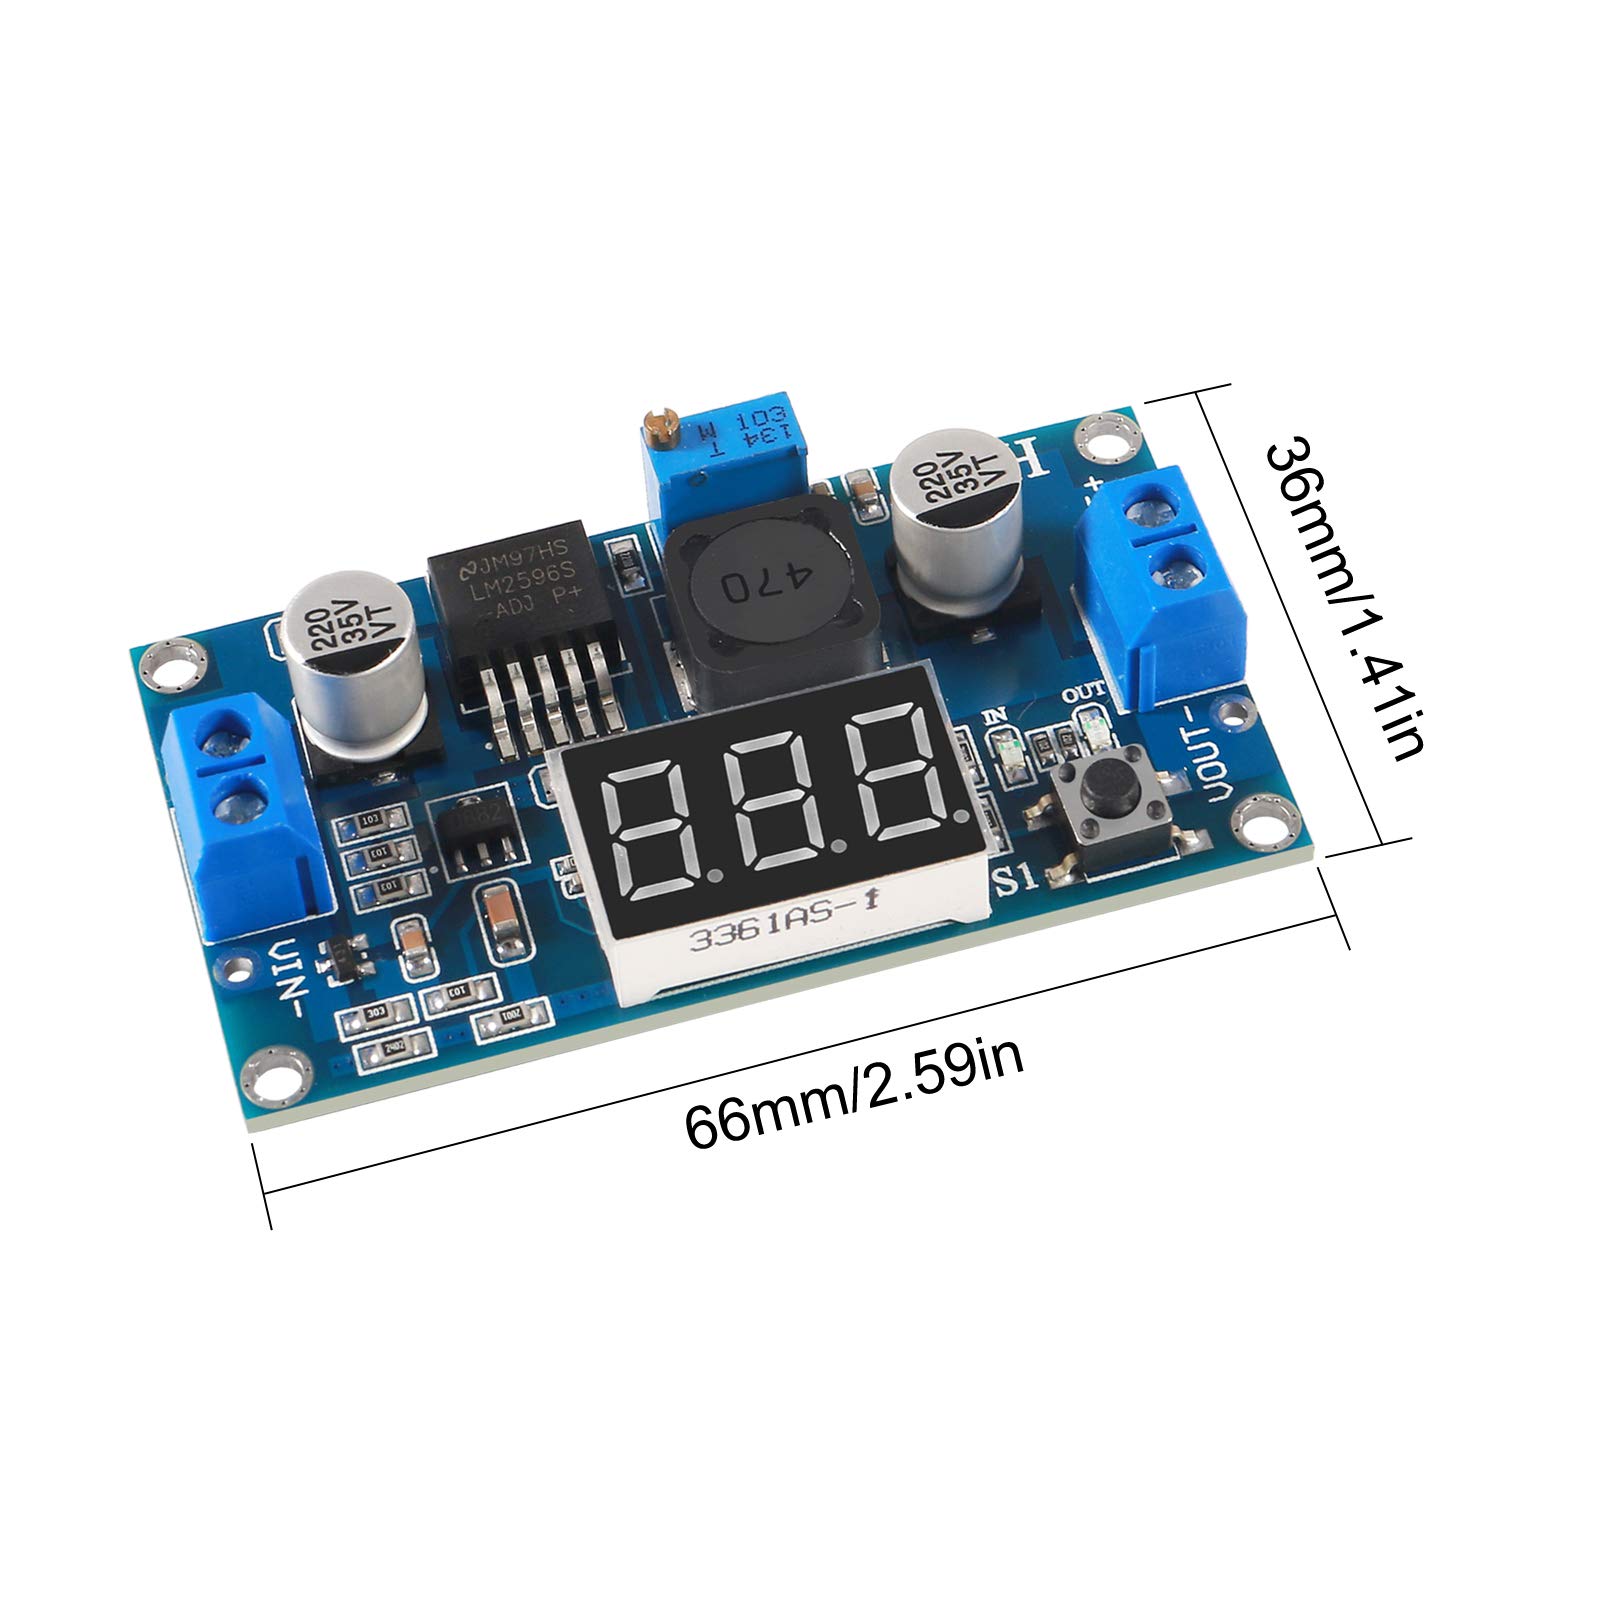
5Pcs LM2596S DC-DC LM2596 with LED Display Voltmeter Buck Converter Step-Down Regulator 4.0-40V to 1.25-37V DC 36V to 24V to 12V to 5V Power Supply Module Compatible with Car Motor Buck
Share Tweet
*Price and Stocks may change without prior notice
*Packaging of actual item may differ from photo shown
- Electrical items MAY be 110 volts.
- 7 Day Return Policy
- All products are genuine and original
- Cash On Delivery/Cash Upon Pickup Available


5Pcs LM2596S DC-DC LM2596 with LED Display Features
-
LM2596 buck converter stably output, voltage conversion efficiency is up to 96%. The output voltage is 1.25V-37V (continuously adjustable, the input voltage must be 1V higher than the output voltage),the output current is 2A (normal and stable), the maximum is 3A.
-
The digital can be turn on or off, to show input or output voltage. With advanced voltage microprocessor, self calibration, the voltmeter error±0.1V, the input voltage is DC 0~40V, (Note: To ensure the accuracy of the voltmeter, please ensure that the input voltage is above 4V).
-
NOTE: This is a buck module. The input and output connectors cannot be reversed. The input voltage must be higher than the output voltage. A radiator is required for long-term work above 2A/15W. When using it for the first time, it is necessary to turn the potentiometer counterclockwise more than 10 times.
-
Press the button next to voltmeter to test input voltage or output voltage. Green LED lights on when testing output voltage; red LED lights on when testing input voltage.Press the button for 1 to 4 seconds, voltmeter would be shut off when releasing your hands; the voltmeter is very accurate.
-
Analog control: using a mini screwdriver to increase or decrease output voltage by adjusting the screw, clockwise to step up voltage and counterclockwise to step down voltage.
About 5Pcs LM2596S DC-DC LM2596 With LED Display
Specification: Module Model: LM2596 Buck Converter + Voltmeter Cutting Size: 66.04mm x 35.05mm Input Voltage: DC 4.2-40V Output Voltage: 1.25V~37V (continuously adjustable, the input voltage must be 1V higher than the output voltage) Output Current: 2A (normal and stable), 3A Max Ripple Frequency: About 150Khz Ripple Peak: About 100mV Voltage Meter Error: ± 0.1V Keep output under 2A (or 15W), and use a heat sink when for a long time working Wiring connection: IN+: connect IN+ to your Input Positive IN-: connect IN- to your Input Negative Out+: connect OUT+ to your Output Positive Out-: connect OUT- to your Output Negative Applications: Experiment teaching Temporarily set up power supply in the outdoor Car(audio, electric fan)power supply How to calibrate the digital tube voltmeter: Optional steps for the person who need a highly accurate voltage value 1.Short press the left "ON/OFF" button to start up the digital tube voltmeter. Long press(>1s, 4 seconds) the left button to enter self-calibration of voltage measurement(calibration range: -0.5-0.5V, factory setting is 0.0). "IN" indicator lights = input voltage measurement calibration starts. Then, long press(>2 seconds) the right "Mode" button, "OUT" indicator lights = output voltage measurement calibration starts. Tap the left / right button to reduce / rise by one unit (since the voltage value of one unit is less than 0.1V, you need to 1-5 times tap the button continuously, so that the voltmeter can change by 0.1V) 3.After calibration, long press(>2 seconds) the right "Mode" button to preserve the adjusted value(no loss with outage) and back to normal voltage display. Package includes: 5 X DC-DC Volt Buck Converter